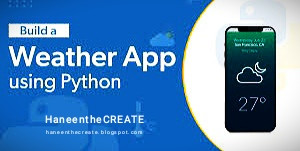
Learn how to create a weather app using Python. Get real-time weather information and display it in a user-friendly interface.
Welcome to our tutorial on building a weather app using Python! In this step-by-step guide, we'll walk you through the process of creating a weather application that fetches real-time weather data and displays it in a user-friendly interface. By the end of this tutorial, you'll have a working weather app that can provide accurate weather information for any location.
Table of Contents:
1. Prerequisites
2. Setting up the Project
3. Fetching Weather Data
4. Designing the User Interface
5. Displaying Weather Information
6. Adding Extra Features
7. Conclusion
Section 1: Prerequisites
To follow along with this tutorial, you'll need a basic understanding of Python programming and some knowledge of working with APIs. Familiarity with GUI programming concepts will be helpful but not required.
Section 2: Setting up the Project
First, let's install the necessary libraries. Open your terminal or command prompt and run the following commands:
```python
pip install requests
pip install tkinter
```
Next, create a new Python project in your preferred IDE or text editor. Once your project is set up, create the following files in your project directory:
- `weather_app.py` - This will be the main file where we write our application logic.
- `api_key.txt` - This file will store your weather API key.
Section 3: Fetching Weather Data
Before we can fetch weather data, we need to obtain a weather API key. Sign up on a weather API provider's website, such as OpenWeatherMap, and get your API key. Store the API key in the `api_key.txt` file.
Now, let's fetch weather data using the API. Open the `weather_app.py` file and add the following code:
```python
import requests
def get_weather_data(api_key, location):
url = f"http://api.openweathermap.org/data/2.5/weather?q={location}&appid={api_key}"
response = requests.get(url)
data = response.json()
return data
```
Section 4: Designing the User Interface
To create a user-friendly interface, we'll be using the tkinter library. Add the following code to the `weather_app.py` file:
```python
import tkinter as tk
def create_window():
window = tk.Tk()
window.title("Weather App")
label = tk.Label(window, text="Enter Location:")
label.pack()
location_entry = tk.Entry(window)
location_entry.pack()
button = tk.Button(window, text="Get Weather", command=lambda: get_weather(location_entry.get()))
button.pack()
window.mainloop()
```
Section 5: Displaying Weather Information
Now, let's fetch the weather data and display it on the interface. Update the `get_weather` function and add the following code:
```python
def get_weather(location):
api_key = open("api_key.txt").readline().strip()
data = get_weather_data(api_key, location)
weather_info = f"Weather in {location}: {data['weather'][0]['description']}"
weather_window = tk.Toplevel()
weather_window.title("Weather Information")
info_label = tk.Label(weather_window, text=weather_info)
info_label.pack()
```
Section 6: Adding Extra Features
To enhance our weather app, we can add error handling and display additional weather information. Modify the code as follows:
```python
def get_weather(location):
api_key = open("
api_key.txt").readline().strip()
data = get_weather_data(api_key, location)
if data["cod"] != "404":
weather_info = f"Weather in {location}: {data['weather'][0]['description']}"
weather_info += f"\nTemperature: {data['main']['temp']}°C"
weather_info += f"\nHumidity: {data['main']['humidity']}%"
weather_info += f"\nWind Speed: {data['wind']['speed']} m/s"
weather_window = tk.Toplevel()
weather_window.title("Weather Information")
info_label = tk.Label(weather_window, text=weather_info)
info_label.pack()
else:
error_window = tk.Toplevel()
error_window.title("Error")
error_label = tk.Label(error_window, text="Location not found!")
error_label.pack()
```
Section 7: Conclusion
Congratulations! You have successfully built a weather app using Python. You learned how to fetch weather data from an API, design a user interface using tkinter, and display weather information to the user. Feel free to further enhance the app by adding more features and customizations.
By following this tutorial, you gained valuable experience in Python programming, working with APIs, and building user interfaces. Start building your weather app today and enhance your coding skills!
Happy Coding!
Buy Me a Chai ! ☕
If you're Not Indian 🥺 Please Send Me a Thanks or Amazon Gift Card to the E-mail
websitehaneen@gmail.com


